1. Help/service desk pipeline creation in CRM.
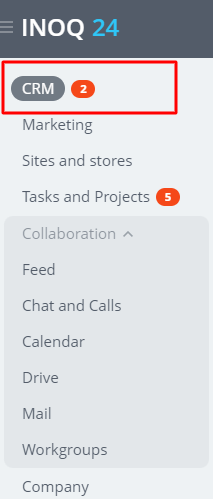
In the left Bitrix24 menu press the CRM tab.
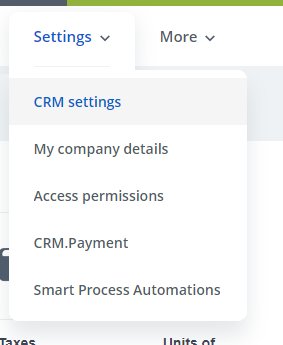
Next click CRM settings in the Settigs tab.
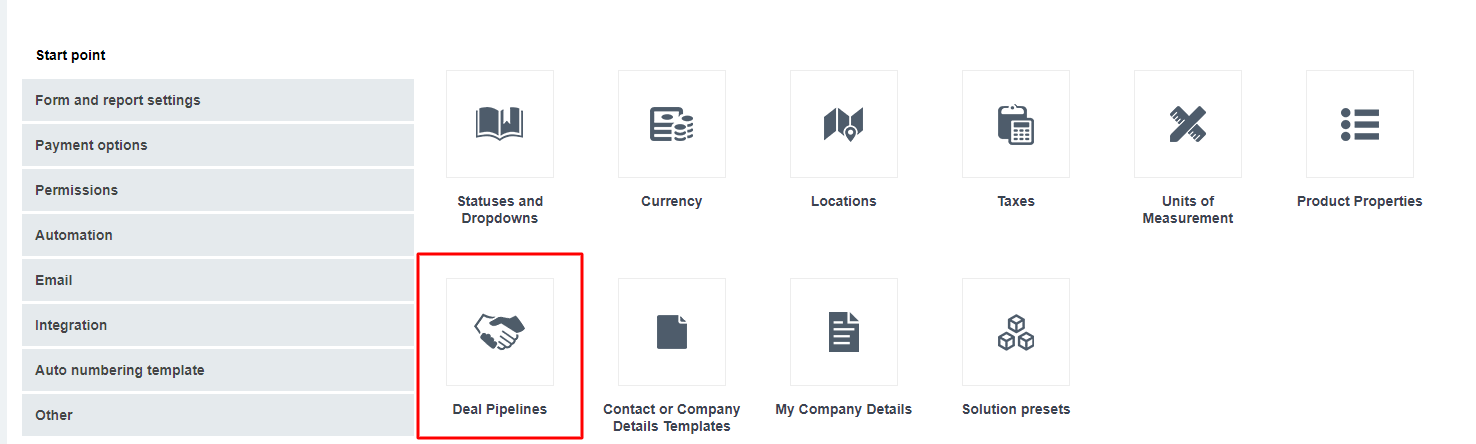
In the CRM settings menu press the Deal Pipelines button
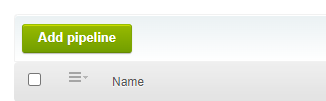
Click Add pipeline

Fill the name of pipeline for example Help_Desk. To change the order in which an new pipeline is shown on the pipeline’s list write down the number in the Sort field. The default value is 10.
2. Pipeline’s stage configuration.
Stages are used by iQdesk as the ticket statuses.
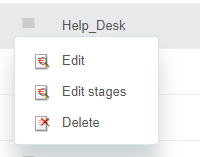
After the pipeline is created click Edit stages button
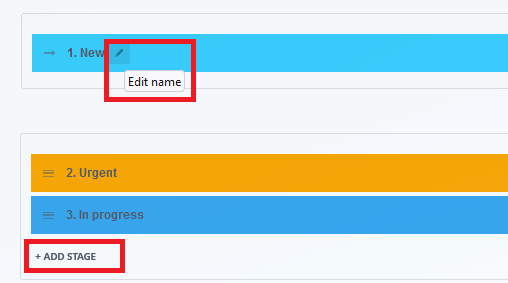
The list of existing stages apears
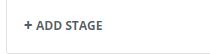
In the appeared form the name of stage can be changed. It is also possible to add the new stage to the pipelnie by clicking ADD STAGE buton so you can adjust pipeline to Your requirements

To save the configuration changes made click SAVE button
3. Creation a task associated with ticket
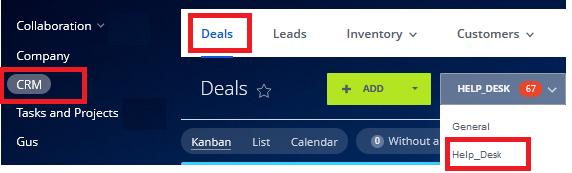
After the creation of pipeline and it’s stages is completed and saved in next step move to created pipeline in CRM menu.

To create a tasks associated with incoming tickets use automation rules funcionality. To do this click Automation rules button.
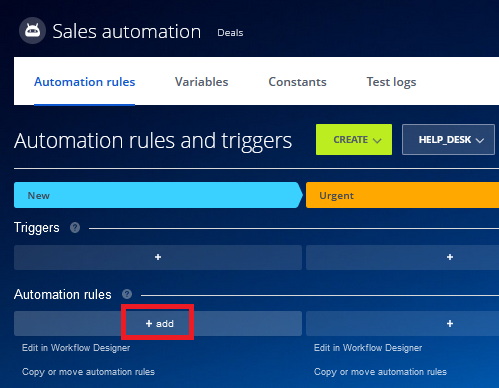
On the first stage click +
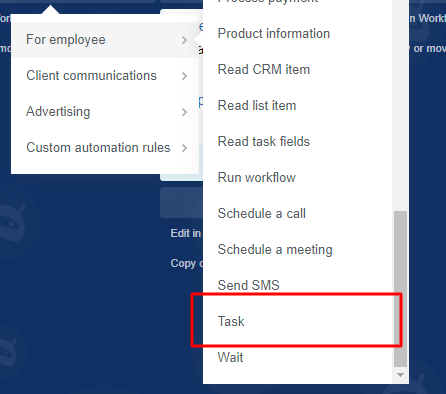
Choose from the list option For employee and then Task
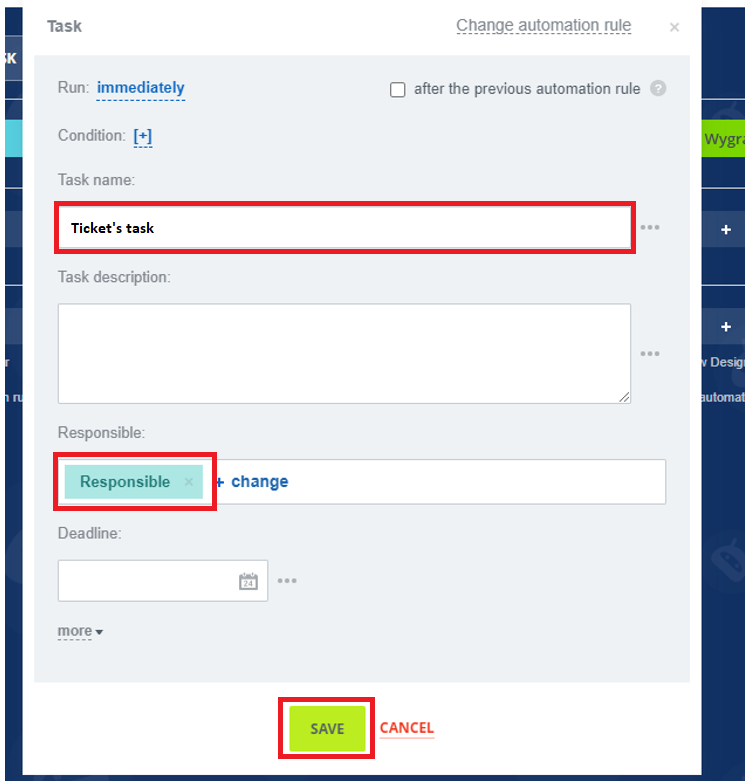
We need to fill the filed: Task name ( any name is OK) and leave the option Responsible set up for Responsible and click Save
4. After finishing the above preconfiguration process go back to Bitrix24.Market and install the iQDesk
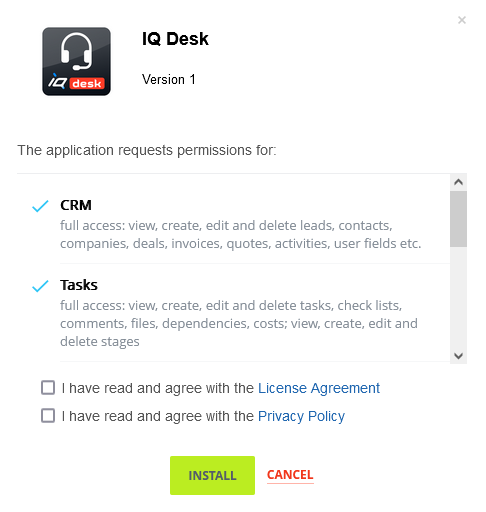
Give permission to iQdesk application
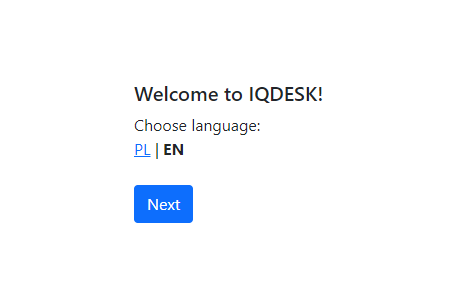
Next step - choose preferable language option
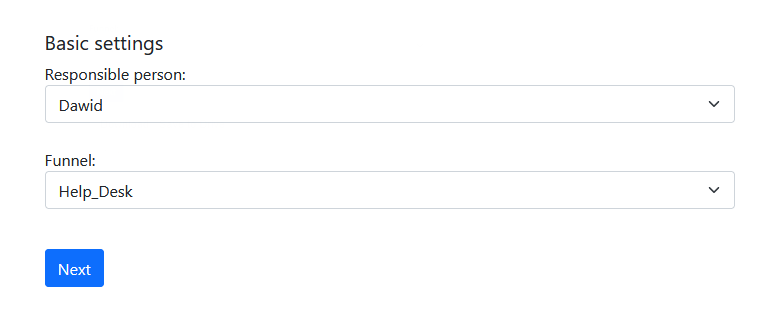
In Basics settings set up:
- Responsible person – it’s the help desk operator who gets all the service requests and then move them to right specialist
- Funnel – choose the pipeline that you created in the 1 step
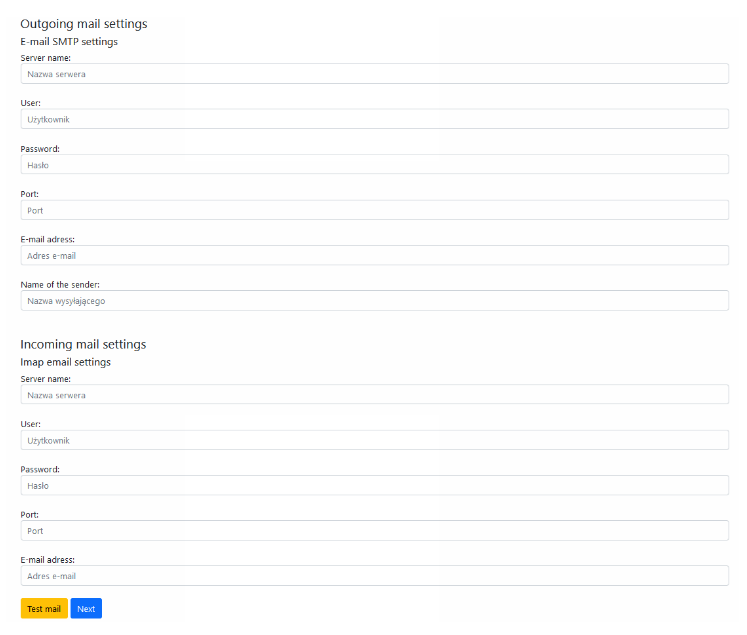
E-mail settings
Outgoing mail settings:
- Use Server name field to provide the outgoing mail server address.
- Use User field to create login to the server
- Use Password field to create the password for outgoing mail server
- Use Port field to create outgoing server sport. Default setting : 465
- Use E-mail address field to provide email for outgoing emails.
- Use Name of the sender to provide the account name for outgoing emails.
Incoming mail settings:
- Use Server name field (in order) to provide ingoing mail server address
- Use User field to create login to incoming mail server
- Use Password field to create the password for outgoing mail server.
- Use Port field to create outgoing server sport. Default setting : 993
- Use E-mail address field to provide email for ingoing emails
Use Next button in order to continue with the installation.
Use Test mail button to run the check for provided parameters
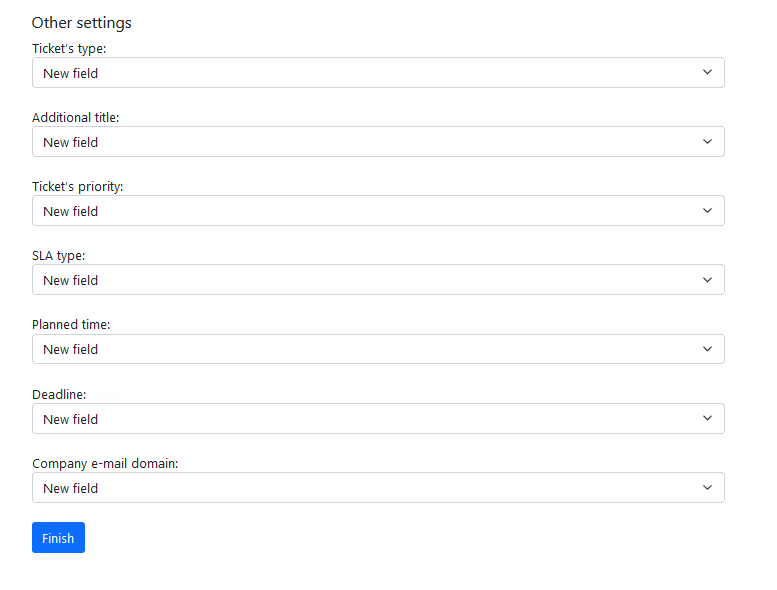
Other settings.
In this stage of instalation the aditional Bitrix24 fields which increase iQdesk functionality are created
- Ticket’s type – lets you specify Type of a ticket
- Additional title – additional title for a ticket. It’s is visible only for Your IQtest team.
- Ticket’s priority – lets you specify how a ticket is urgent
- SLA type – lets you specify severity of ticket’s error
- Planned time – lets you specify estimate time for ticket resolution
- Deadline - lets you specify deafault deadline. It’s assigned to all incoming ticket and can be manually changed
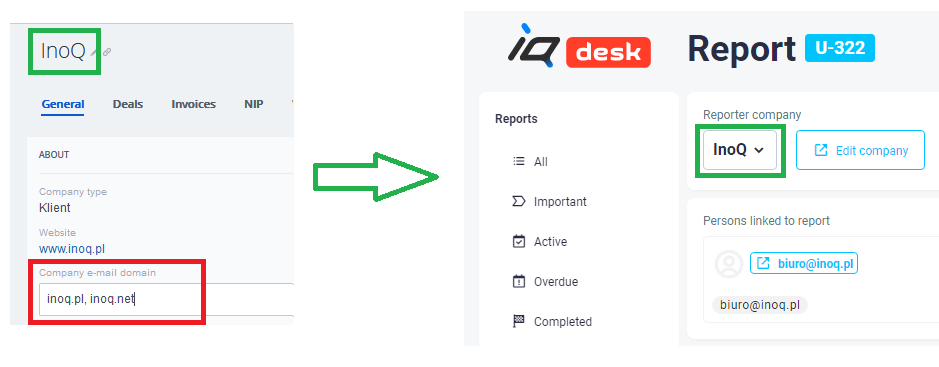
- Company e-mail domain – the field is located in the General form in Companies in CRM. You have specify the email domains from a given client will be sent a tickets..
- Finally click the Finish button.
5. Configure Company e-mail domain
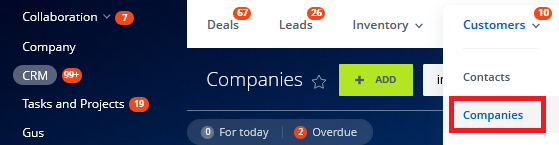
Configure field Company e-mail domain in:
CRM > Customers > Companies
on every Company which can send you tickets